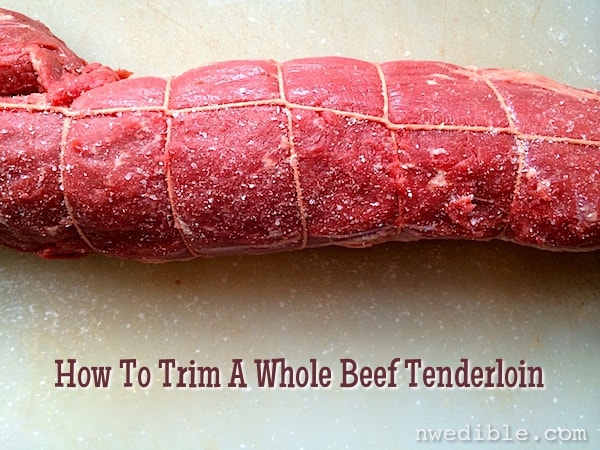
There’s no getting around it: Eye Fillet is a spendy cut of meat. But you can save a bit of money (and control the quality of the cutting) if you start with a whole beef tenderloin and trim and cut it yourself. Finished grass-fed steaks can cost a lot, so when you factor in unusable trim you typically save money DIY’ing your own whole eye fillet.
And it’s really not hard – the tenderloin is a very manageable 1-1.5kg piece of meat, and nothing more than a sharp knife and a cutting board is required. So don’t be scared! This is a straightforward piece of meat on which to practice your fabrication skills. Just go slow – you’re not going to mess anything up.
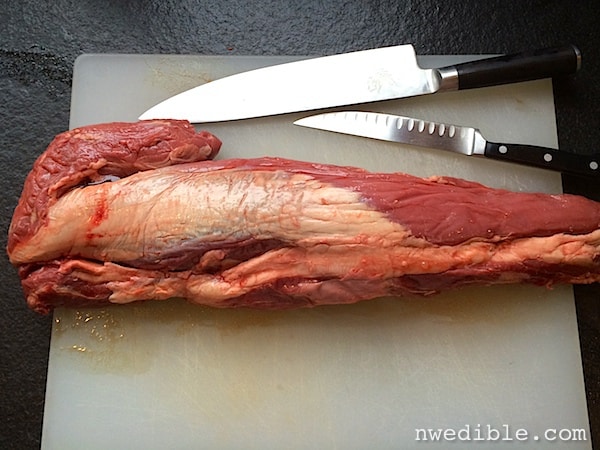
Meet your meat
This is what a whole beef tenderloin looks like. If you buy wholesale this cut is typically sold Cryovac’d and there will be some blood and meat juice in the bag with the tenderloin. If you are buying from a butcher’s case, chances are extremely good that the tenderloin they sell you came to them in the exact same kind of bag, but they will have already opened the bag and patted the meat dry for you.
In any event, pat your tenderloin dry and assess what you are working with.
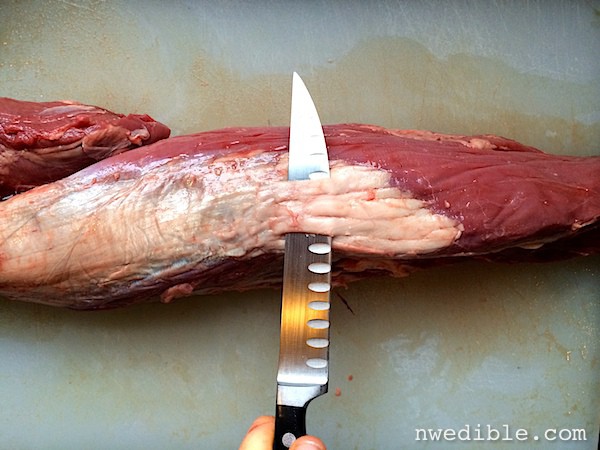
Remove the silverskin
The silverskin is a very tough, chewy piece of connective tissue that covers more than half the top portion of the tenderloin. If you leave it on you might as well wrap your tenderloin in rubber bands. It’s thin, so the goal here is to remove all the silverskin without cutting off a bunch of meat.
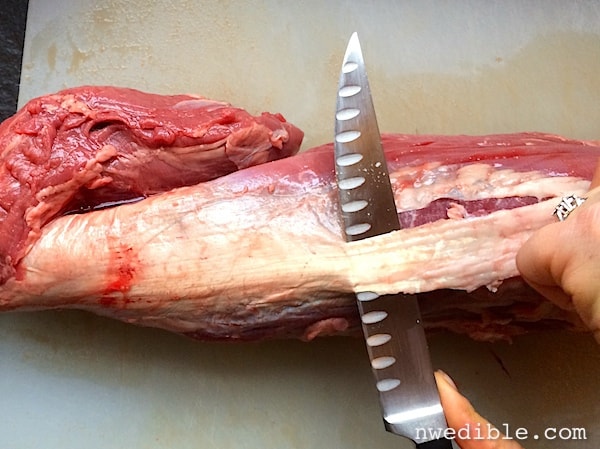
Start by keeping your knife flat parallel to the tenderloin and cut a flap of silverskin off one end. In the picture below, I am just about to slice my knife to the right to create that flap.
Now I’ve created my flap.
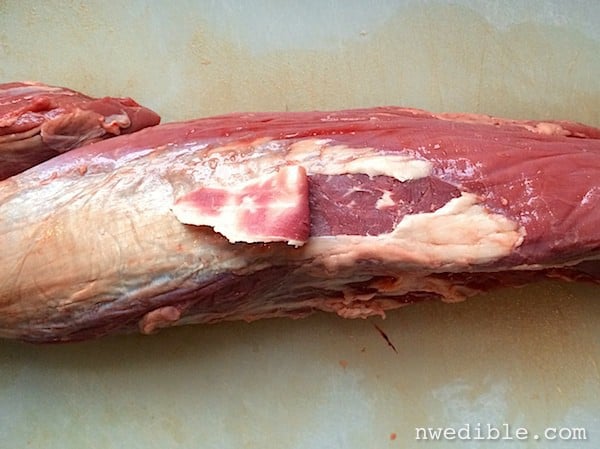
Now turn your knife so that it can slice in the opposite direction and hold that flap tight with your non-knife hand.
Run your knife along the inside edge of the silverskin, cutting it free from the tenderloin. I hold my knife so that it slants just slightly up and away from the meat. Try not to let your knife gouge into the meat.
Take off one long smooth strip of silverskin.
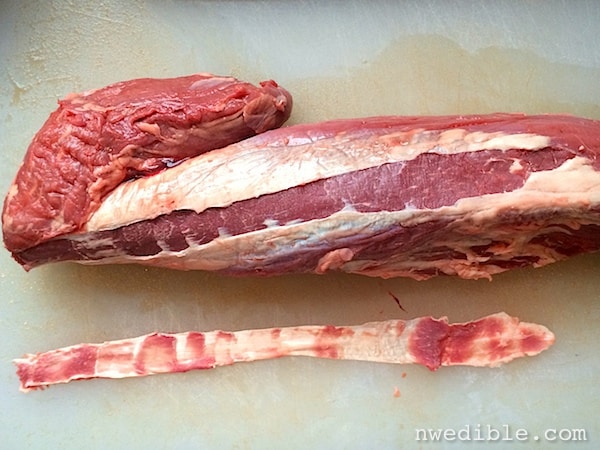
Repeat until all the silverskin is removed, and look over your tenderloin for any scraps of sinew or fat. Check the bottom and cut off any thick hunks of fat. Don’t like to go crazy cutting all the fat off the bottom, though – fat is flavor!
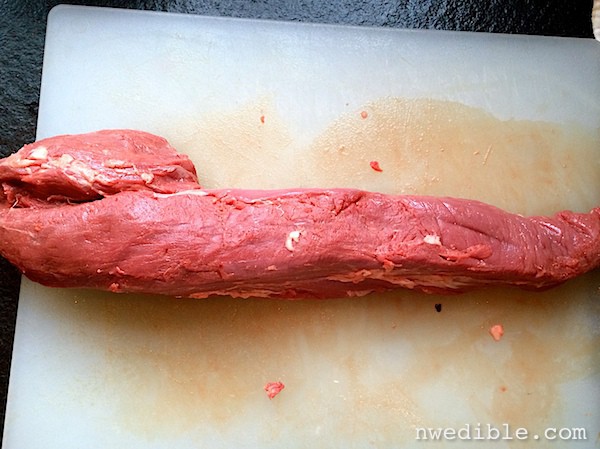
Option one: Tie whole tenderloin for roasting
At this point you have a lovely, whole trimmed beef tenderloin. But note that one end is very thick and one end tapers down to nothing. That isn’t ideal for a roast (uneven cooking, you know how it is) so if you plan to do one big roast, you should tie your tenderloin. You could go for the “a million little belts of string” look, but I prefer to truss my roast butcher style using one long section of butchers twine.
There’s a practical reason: this method for tying a roast stays snug and in place as the meat cooks (and shrinks) while lots of little string belts tend to loosen. Once you get the hang of it, it’s also far faster and frankly just looks cooler than a whole bunch of knots all over your roast.
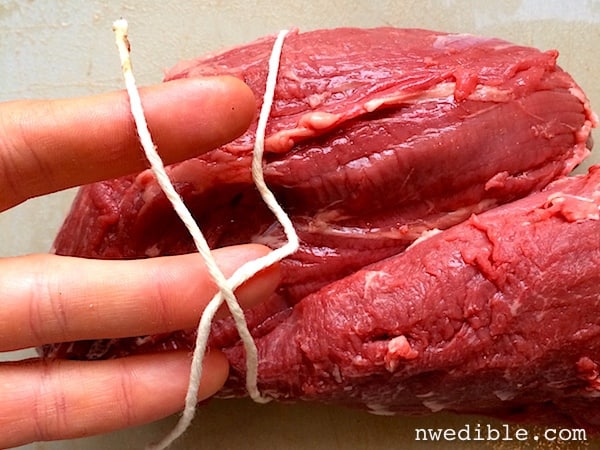
Start with a piece of butcher’s twine about four times the length of your tenderloin. Leave a little extra so you don’t run short. If you want, you can loop the long end of your string up and over your shoulder to keep it out of the way.
Start at the fat end of the tenderloin, where it looks more like two muscles than one. Loop your string under the tenderloin, like so:
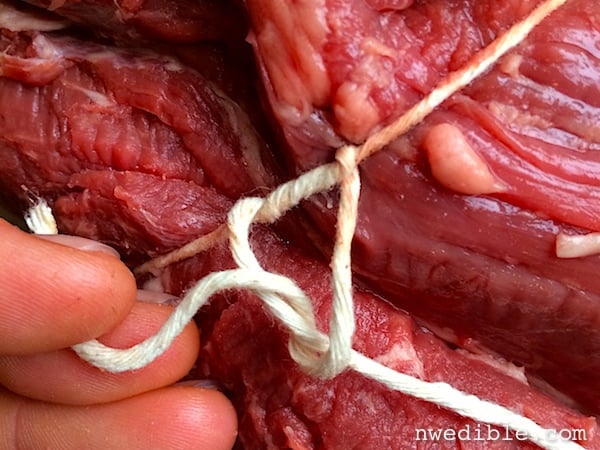
Now twist the twine around itself several times, pull snuggly and knot. The twists will keep the twine from working free. Don’t be afraid to pull the twine very snug – you don’t want to garrote your meat, but the twine should sink into the tenderloin a bit.
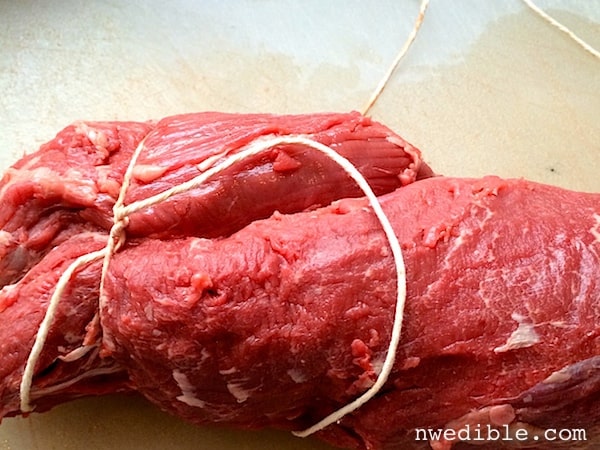
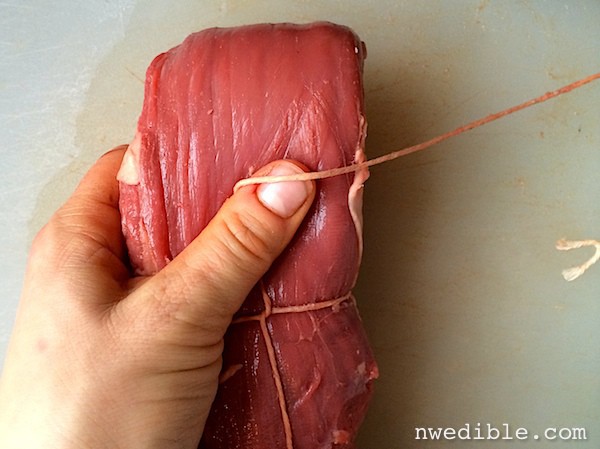
Now comes the fun part. Imagine a center line running down your beef tenderloin. Trail your twine an inch or two down that centerline, then loop the twine under the tenderloin. In the top of the photo below you can see the long end of the twine coming out from below the meat.
Now loop the long end of the twine back over the top of the tenderloin, and catch the “centerline” section of twine so that, when you look down on it, the truss forms a letter H shape. Pull snuggly, wiggling the twine back and forth if necessary to get it to seat snuggly in the meat.
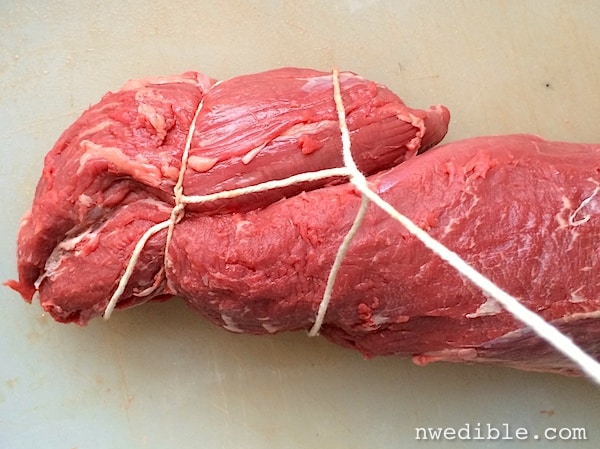
Now repeat that “centerline, loop under, catch and through” motion down the length of your roast.
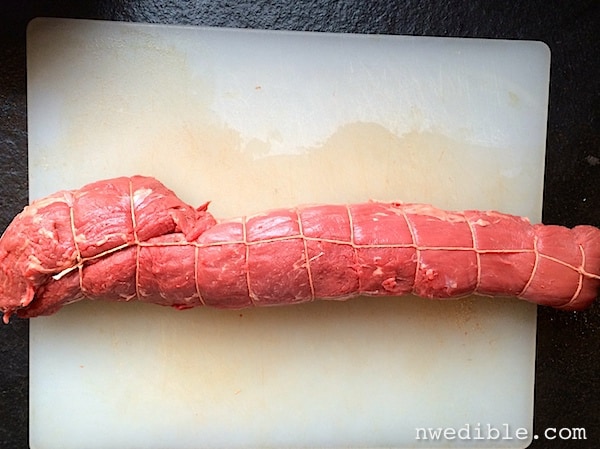
At the narrow end of your tenderloin, tuck the last several inches of roast under itself. This really helps keep the width of the roast more even and prevents that end part from overcooking.
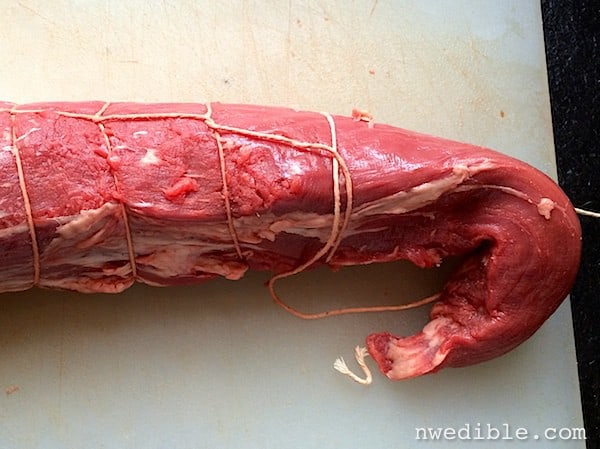
Hold the end bit firmly as you complete your truss, make sure everything is snug.
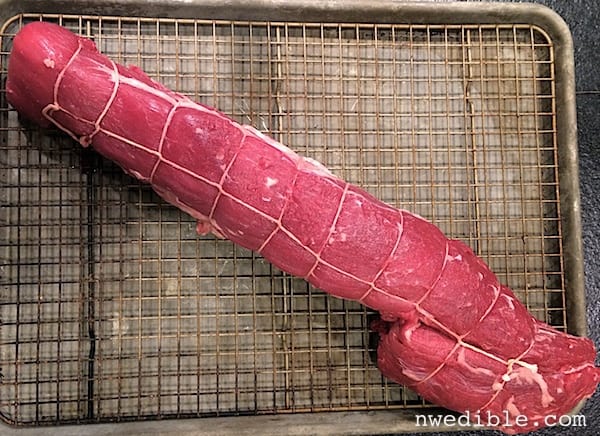
Finish with another twist-twist-knot. On wider roasts, I’d flip the meat over and run the string back up the centerline on the bottom, but for something this narrow, if your twine is snug around the roast there isn’t much risk of the strings moving around in cooking so I don’t worry about it.
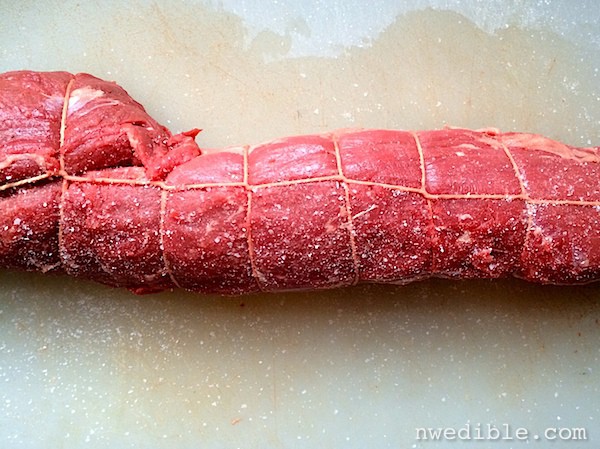
Now just season your meat and proceed with your favorite Roast Tenderloin recipe.
Option two: Cut Eye Fillet steaks
Some people will probably point out that not all steaks cut from the tenderloin are technically filet mignon and they might start swinging around terms like centercut and chateaubriand and tournedos. Blah blah blah – you can ignore all that. In the United States, filet mignon is basically a marketing term for a steak cut from the tenderloin, and that’s what we are going to do here.
If you want to go for individual steaks, start with your trimmed up tenderloin.
The last few tapered inches aren’t really wide enough to cut a nice steak from so set that piece aside. That’s the Scooby Snack you get later for all your hard at home beef fabrication work.
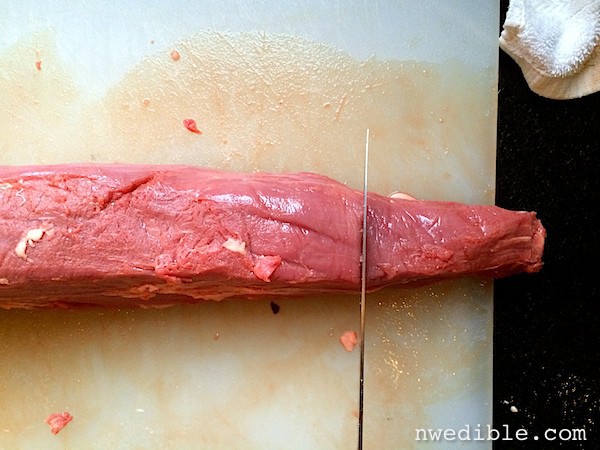
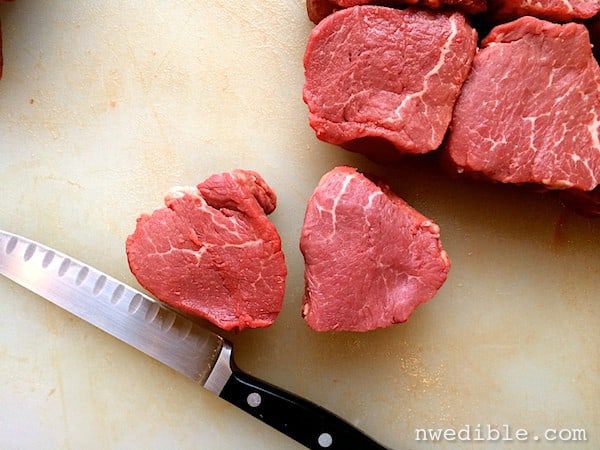
Now use your hands to kind of smoosh the thinner end of the tenderloin up and smooth the middle section in. This will make the tenderloin a more uniform thickness and make it easier for you to cut uniform sized steaks. Cut your first steak – I recommend about an inch-and-a-half in thickness. Then, use that first one as a guide for the reminder for the rest.
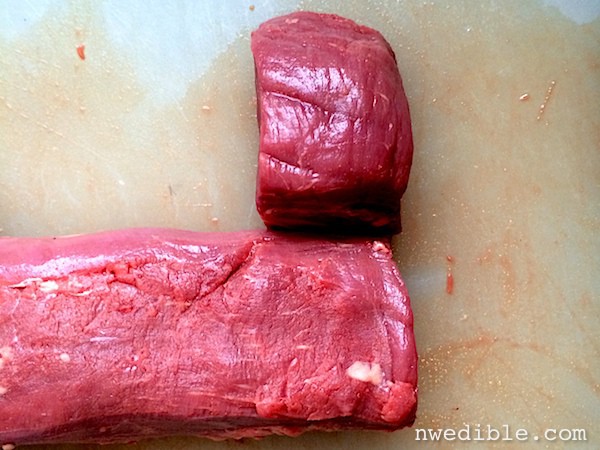
Keep cutting steaks until you get to the head of the tenderloin, where the muscle splits.
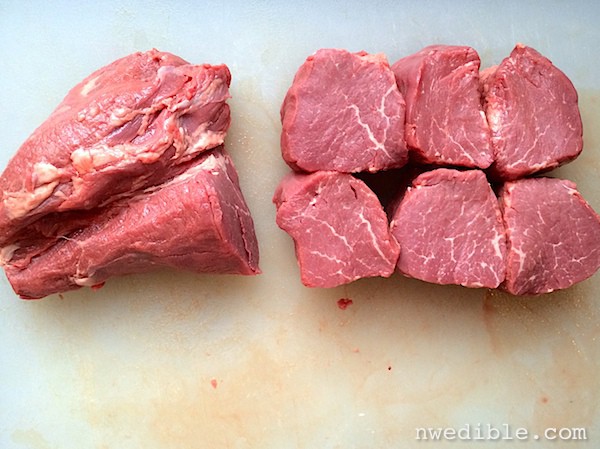
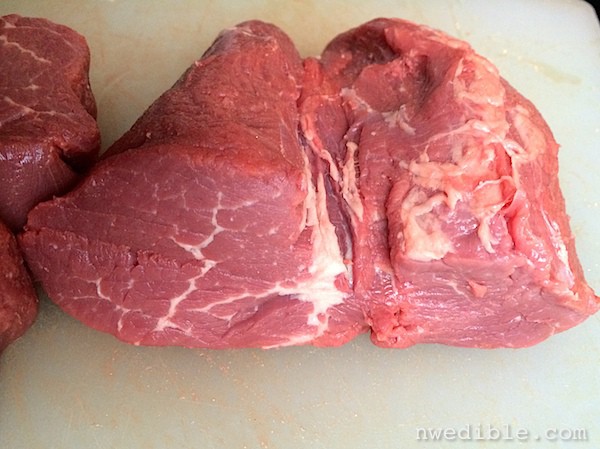
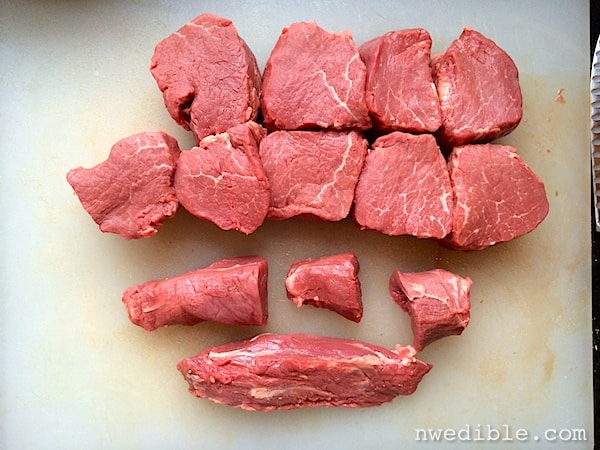
At this point I do something a bit unconventional and cut a few more steaks out of this portion of the tenderloin. There’s a pretty natural “dividing line” that I follow where the intramuscular fat is a bit thicker. Slice along that line, gently smoosh the portions as necessary to make more uniform width steaks, and you should get three or four more steaks from the head.
This tenderloin is pretty small, but I was still able to cut three additional nice sized steaks from this area.
Here’s the total from one tenderloin: nine nice-sized tenderloin steaks and some that’s not quite right for steaks but will make an excellent pan fry for the cook.
Now just season your steaks and cook as desired. I prefer oil, salt, pepper a screaming hot cast iron skillet but I’m a simple girl.
If you are unsure about cooking times, The Meat Stick thermometer is now available at our stall in the South Melbourne Market, it takes the hassle out of cooking with its helpful app.